Один из самых популярных вопросов у начинающих веб-мастеров - Как установить SSL-сертификат на сайт, который находится на хостинге. На самом деле нет ничего проще, если вы клиент ProfitServer. В этом случае все почти автоматизировано, а вам остается лишь выполнить несколько простых действий для установки SSL-сертификата на хостинг.
Итак, надеемся, что SSL-сертификат у вас уже есть. А если его нет, то вот инструкция, как заказать SSL-сертификат на свой сайт. Если вы сертификат уже заказали, то читайте дальше как установить SSL на хостинг. Это очень просто. Для начала необходимо авторизоваться в биллинг панели по адресу https://ps.profitserver.pro/
1. Если вы приобрели сертификат у ProfitServer, то войдите в панель биллинга, выберите раздел «SSL-сертификаты». Далее скачайте на свой ПК его файлы и секретный ключ. По ссылке «сертификат» скачается архив в котором находится файл сертификата и три файла цепочки сертификатов.
Если сертификат был приобретен у другого провайдера, то скачайте необходимые файлы у него.

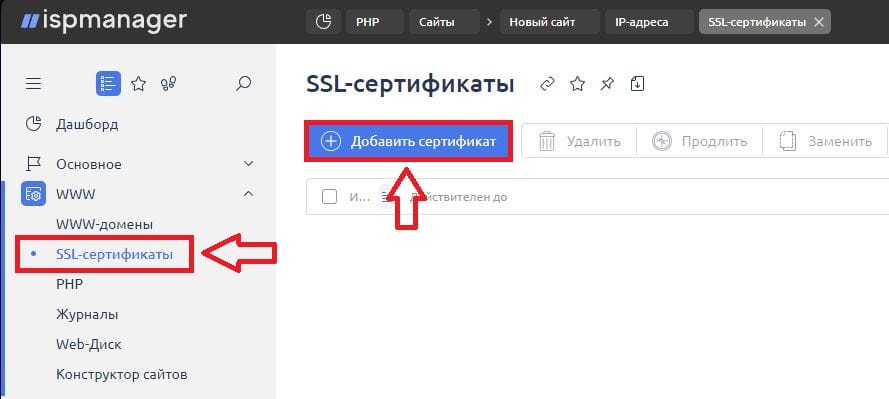
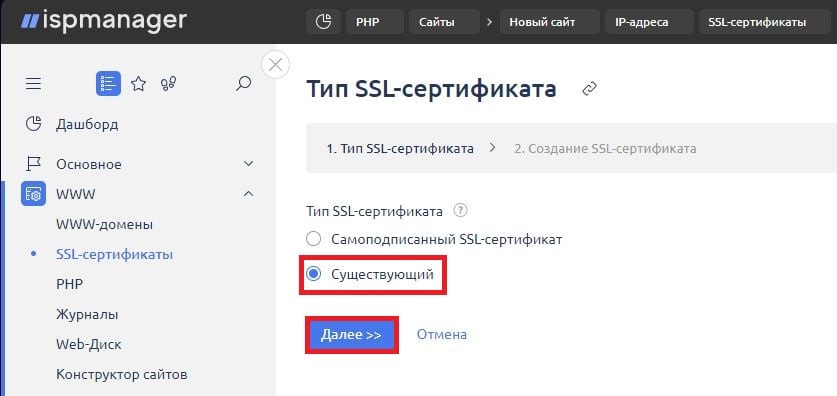
2. Заходим в панель управления хостингом, раздел SSL-сертификаты и нажимаем кнопку «Добавить сертификат», выбираем «Существующий» и нажимаем «Далее»
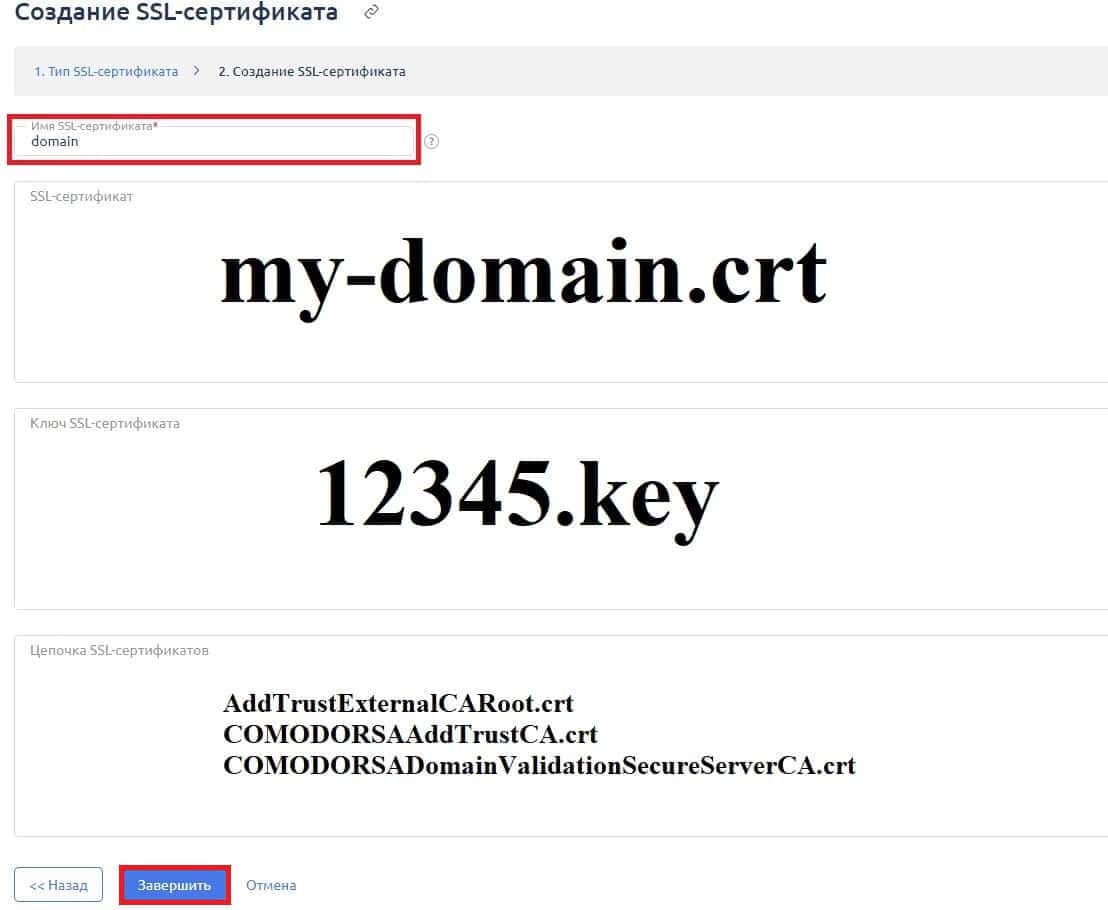
3. В открывшемся окне необходимо указать имя сертификата и заполнить текстовые поля содержимым файлов сертификатов. Файлы открываются в текстовом редакторе и содержимое просто копируется. В поле «Цепочка сертификатов» последовательно вставляется содержимое всех трех файлов цепочки. После того, как все данные перенесли в нужные поля, нажимаем кнопку Завершить.
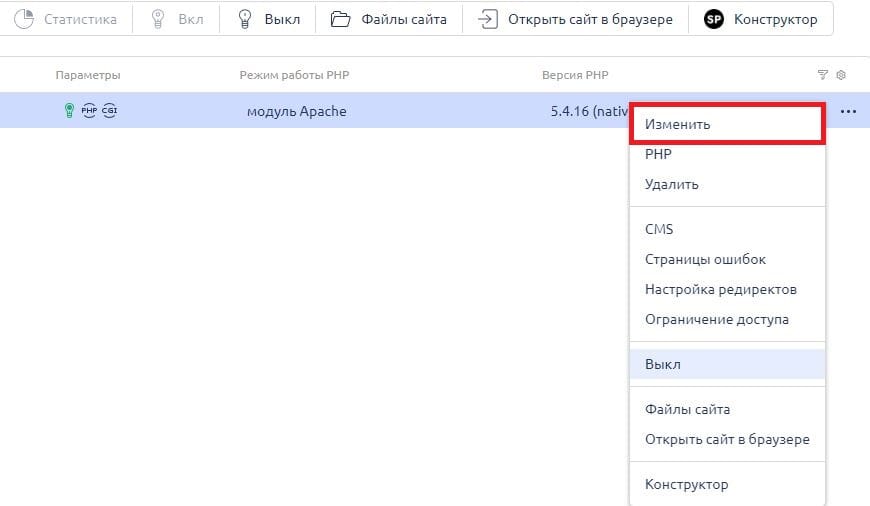
4. Далее переходим в раздел «WWW-домены», выбираем домен, для которого создан сертификат и нажимаем «Изменить»
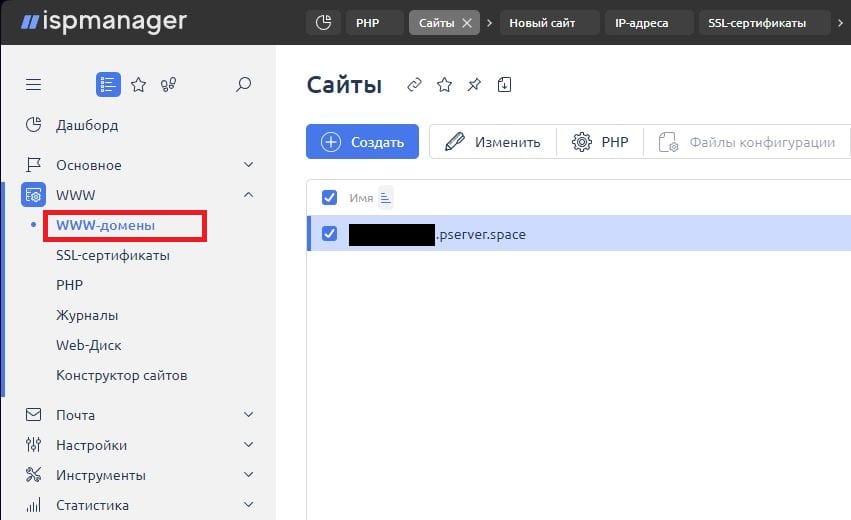
5. В свойствах домена включаем защищенное соединение и выбираем из выпадающего списка сертификат, созданный на предыдущем шаге.
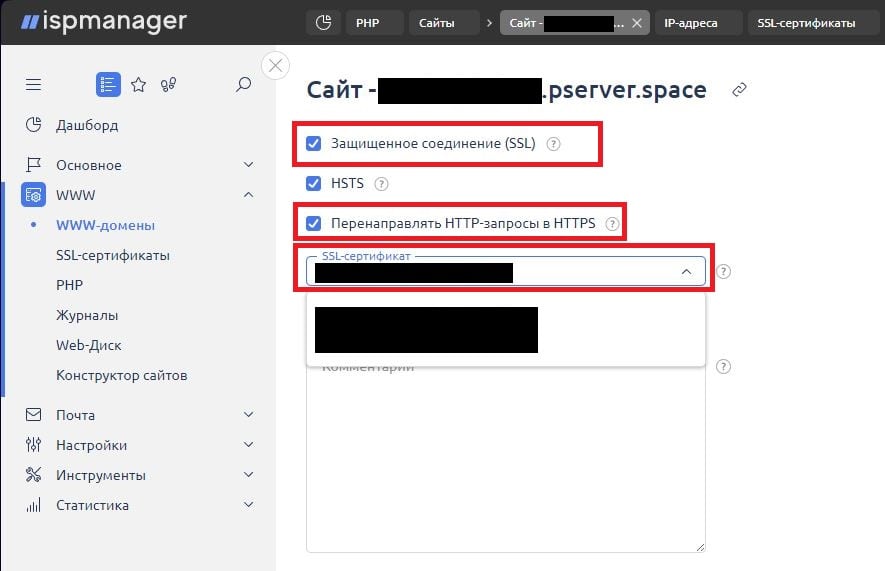
Остается только нажать OK и ваш SSL-сертификат установлен!