Sometimes, connecting via Web VNC is impossible due to incorrect browser settings or because the provider blocks the ports needed for Web VNC to work. In such cases, you can connect to the server using the VNC protocol. This can be done using a client program. In this article, we will discuss two such VNC clients.
Connection Setup
1. Download and install a VNC client. For instance, TightVNC (https://www.tightvnc.com/download.php) or RealVNC Viewer (https://www.realvnc.com/en/connect/download/viewer/).
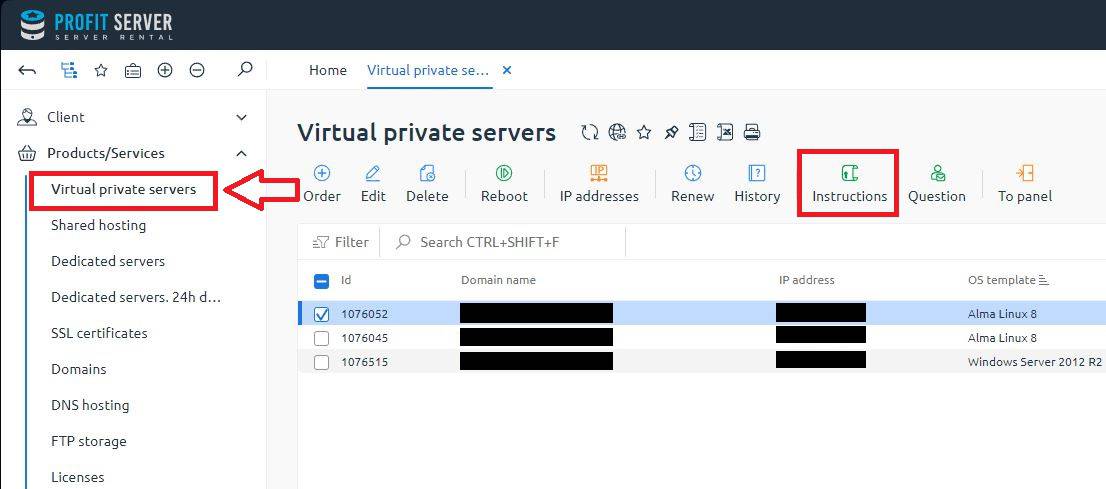
2. Go to the BillManager control panel. To do this, carefully read the activation letter — it contains a separate username and password for billing access. Select the Virtual Servers section, then mark the required server and click Instructions:
3. In response, the connection data will be displayed:
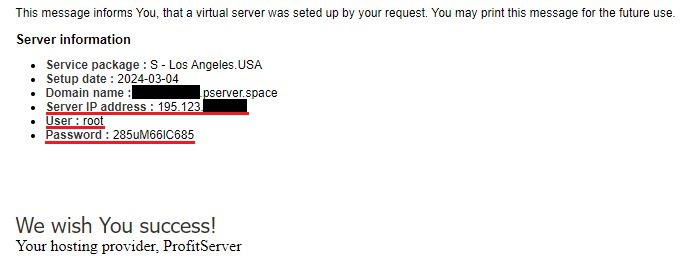
4. You need to copy the server address, username, and password. These details will be used to connect to the server. The connection will occur over port 22.
Connecting using TightVNC Viewer
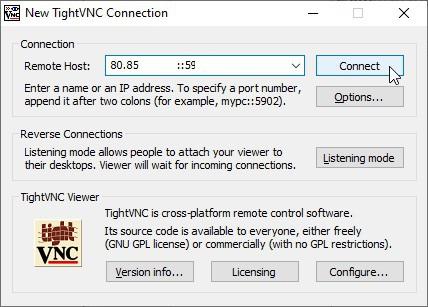
1. If you have installed TightVNC, then open TightVNC Viewer. In the Remote Host field enter the IP address for VNC connection and, after two colons (::), the port and then press Connect.
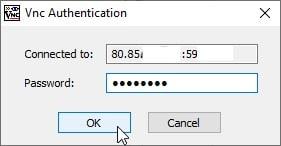
2. In the next window enter the password and press OK.
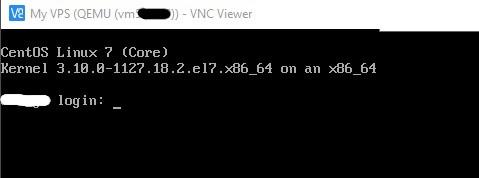
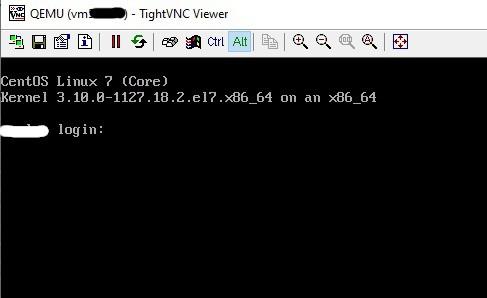
3. After that you would see the server’s console (login screen or desktop in case of Windows).
Connecting using RealVNC Viewer
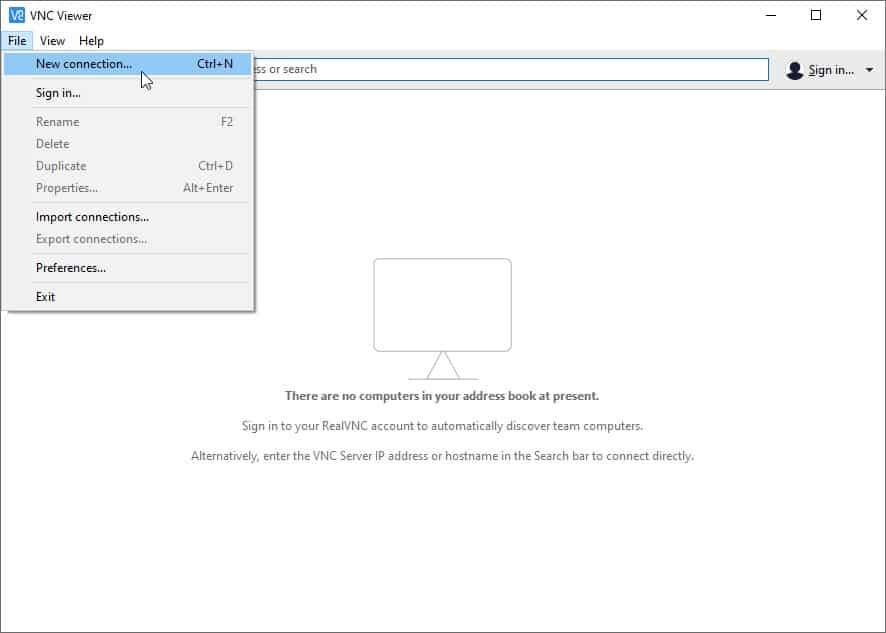
1. If you have installed RealVNC, then open the VNC Viewer application.
2. Then create a new connection via File -> New connection menu.
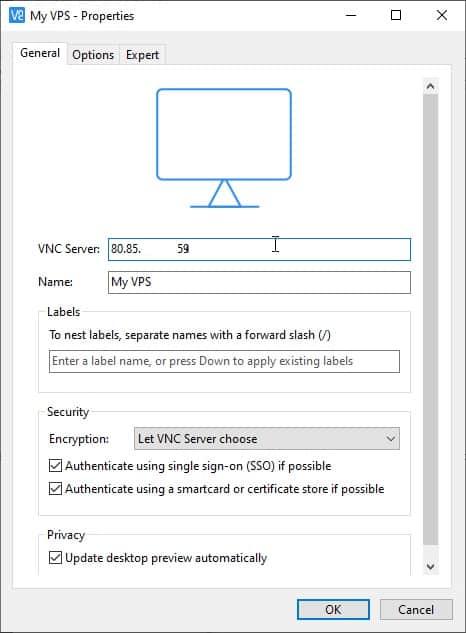
3. In the next window enter the IP address in the VNC Server field and, after a colon, port. In the Name field enter some title for this connection.
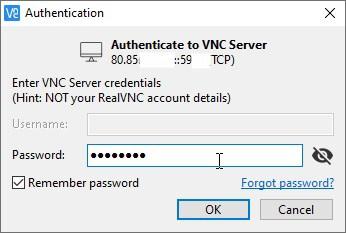
4. Then initiate the connection by double-clicking on it. Enter the password in the next window. Click on the checkbox, if you want the application to remember that password.
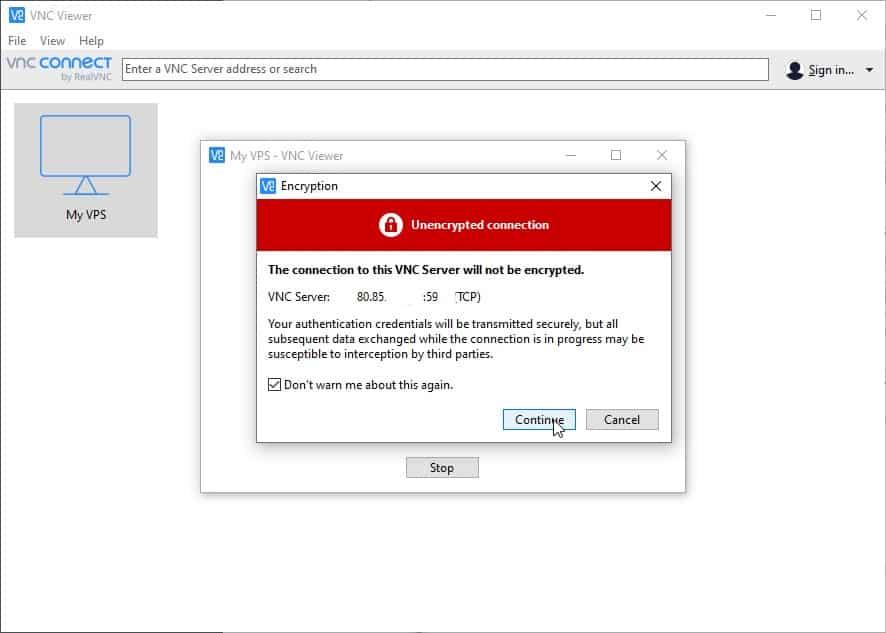
5. Ignore the warning about an unencrypted connection.
6. After that you would see the server’s console (login screen or desktop in case of Windows).