The primary way to connect to a Linux server is through SSH protocol. This type of connection is secure, because all the data transferred through it is encrypted. In order to establish SSH connection you should configure it on the remote server that you want to connect to, and the client on the user’s side. There is a ton of software for SSH connection. As for Linux, OpenSSH package is the most popular and for Windows people are mostly using PuTTY.
Let’s take a closer look at server configuration using Ubuntu Server 18.04 as an example, and then try to connect to the server from Linux and Windows.
Everything we do will be from an ordinary user’s account. In this case, we created a user “mihail”, and “root” account is disabled by default.
Server side setup
Set up the package running this command:
sudo apt install openssh-server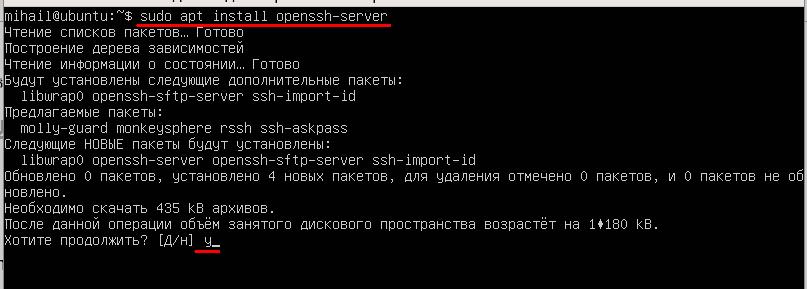
After installation is finished, make sure that the service is running. Use this command:
systemctl status sshd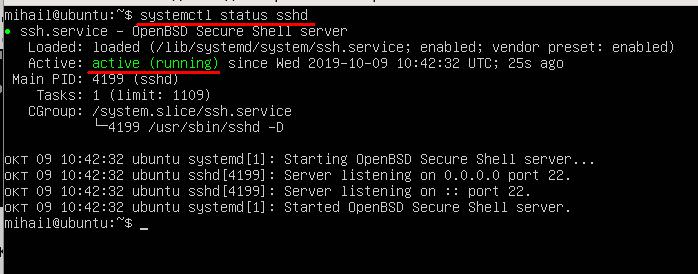
Status “Active (running)” means that the service is enabled and operating normally.
In order to avoid blocking of incoming connections by the firewall, make sure you disable it, because we’re not going to configure network firewall in this article.
Use this command:
sudo ufw disable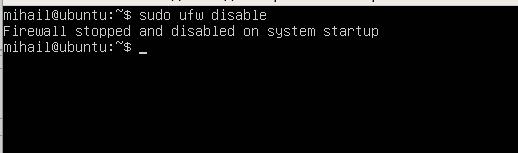
At this stage you can already connect to the server. With default settings server allows connection to the standard port 22 with password-based authentication.
SSH connection from Linux
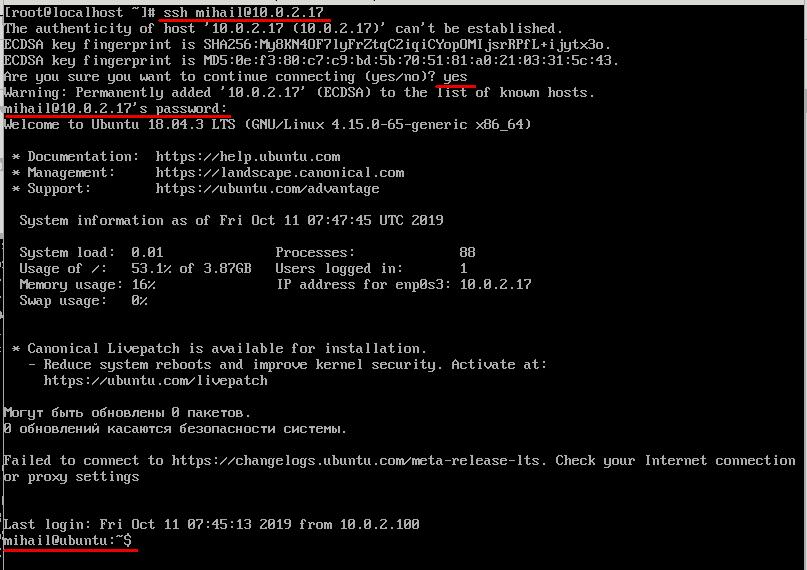
As a rule, OpenSSH client is installed on Linux by default and does not require additional manual configuration. Connection can be established from terminal with the help of ssh command. Parameters in this case would be username and IP address of the remote server. On our test server that we’re using as an example there’s only one account “mihail”, so we’ll use this.
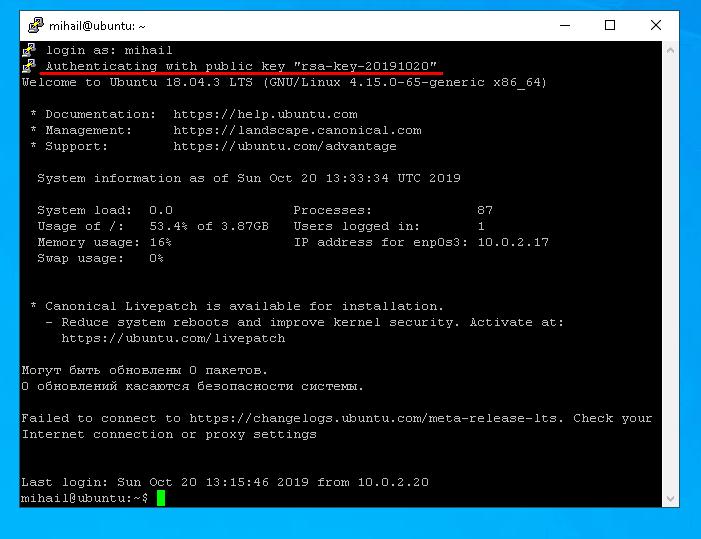
ssh [email protected]At the first connection you will have to confirm addition of the server’s public key to the database, so respond “yes”. After that you can enter the password. If connection is successfully made, you will see a welcome text of the server’s command line. Now all the commands will be executed right on the remote server.
SSH from Windows
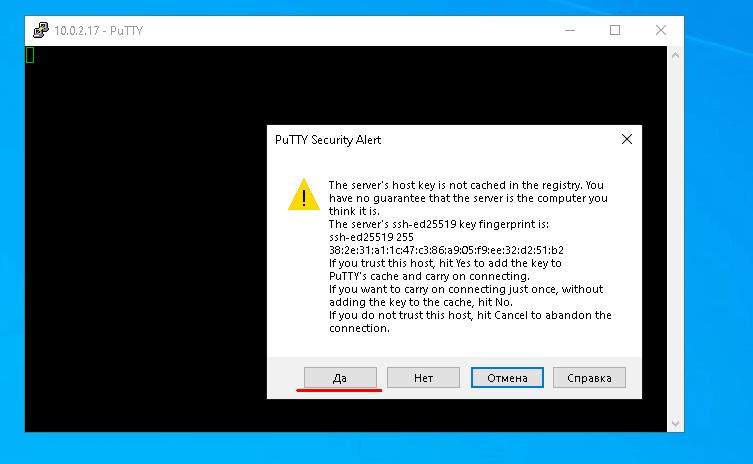
Open Putty and set connection parameters. Make sure that the switch “Connection type” is turned to SSH. Enter the IP address into “Host Name” field, default value 22 into “Port” and click “Open”.

At the first connection Putty will ask you to confirm that you trust this server, so click “Yes”
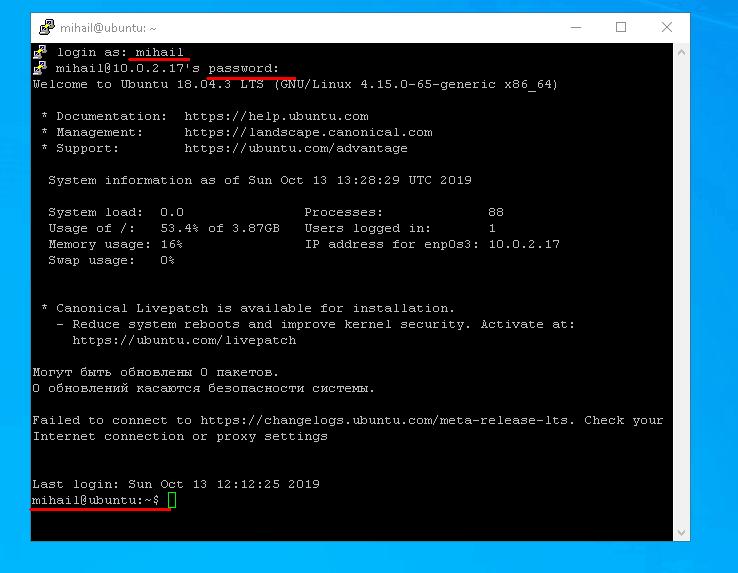
After you enter the login and password, you will see the command line of the remote server.
Authentication by key. Increasing level of security
When a client is trying to establish secure connection to the server through SSH, before allowing the connection the server requires to authenticate (verify) the client. As mentioned before, password-based authentication is usually used by default. It does not provide robust security, because there’s always a way to bruteforce it. Besides, password authentication is not applicable to SSH connections with the use of scripts.
For this type of tasks there is a special authentication method by key. The point is that the client generates private and public keys and then public key is sent to the server. After that you don’t need password to connect to the server, because authentication is conducted based on public and private client keys. To provide good level of security, access to the private key should be restricted. Because of the fact that the private key is stored on the client’s side and is not transferred through the network, this method is believed to be more secure.
Authentication by key on Linux
Let’s generate public and private keys on the client with the help of ssh-keygen utility software. The tool will suggest changing the path to the private key and enter a passphrase for extra security. Leave all the parameters by default by pressing Enter at all requests.
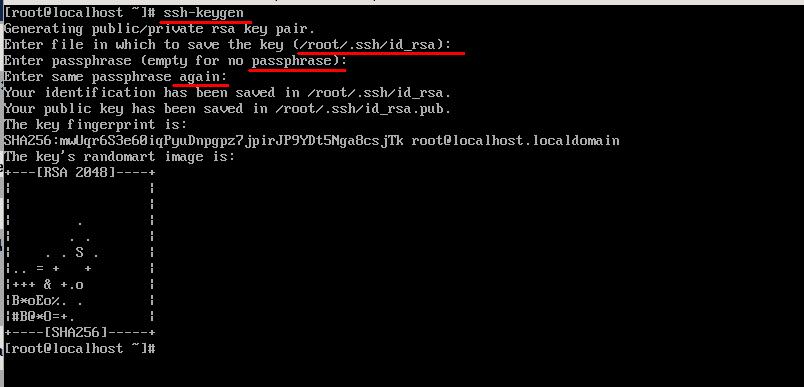
As a result, in the home directory in .ssh folder you will find two files generated: id_rsa and id_rsa.pub that contain private and public keys accordingly.
After that, you will need to send the public key to the server. In order to do that, copy the content of the “id_rsa.pub” file into “~/.ssh/authorized_keys” file on the server. Let’s go the easiest way with the help of “ssh-copy-id” tool. Enter login and IP address of the server, just like in case with ordinary connection. After you enter password, the public key of the client will be automatically copied to the server. Run this command:
ssh-copy-id [email protected]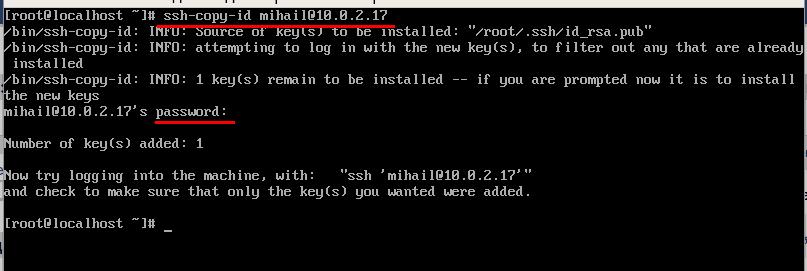
After you do all that, the server will not require entering password anymore.
Authentication by key on Windows
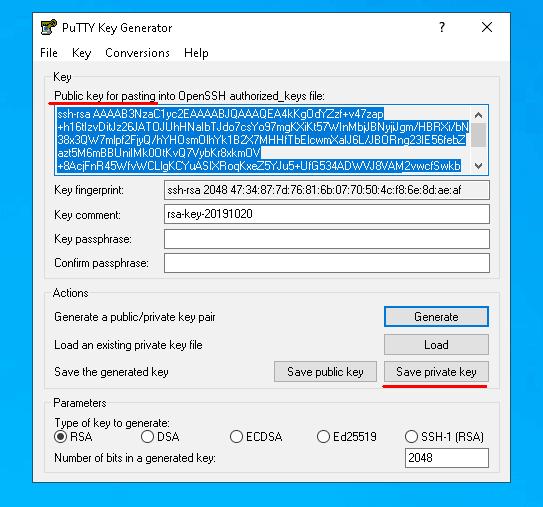
Open PUTTYGEN and click “Generate”. In order to generate the keys, you just need to move your mouse over the screen and the tool will randomly generate the keys.
After the keys are generated, click “Save private key” and save it to the file with private key on your disk. You can set whatever path you like, but a bit later you will need to specify it in Putty. Then copy the public key from the top of the window.
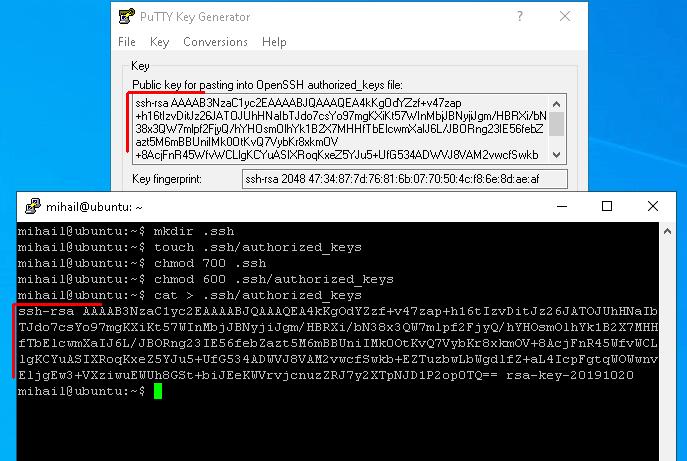
Let’s send the public key by simply copying it to the terminal. Open Putty and connect to the server as usual. Now let’s create “.ssh/authorized_keys” and restrict the other users from accessing the file, so it’s only available to the creator.
mkdir .ssh
touch .ssh/authorized_keys
chmod 700 .ssh
chmod 600 .ssh/authorized_keys
After creating the file, put the client’s public key in it. At the previous stage we copied public key to clipboard. To record what’s in clipboard to the file use cat command and output redirection.
cat > .ssh/authorized_keysAfter you enter the command, click right mouse button in the terminal window and paste what’s in the clipboard. To confirm the input, press “Ctrl+D” shortcut and disconnect from the server.
Now let’s specify the path to the private key in Putty and connect to the server again.
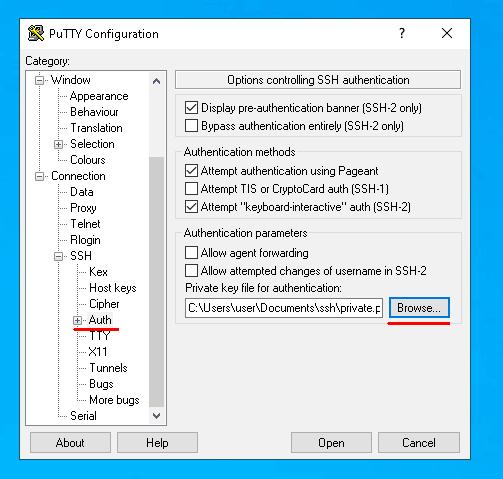
From now on, in order to connect to the server you’ll only need to enter username. If you’re trying to connect to the server from another device that does not have the right private key, the server will request password. After key-based authentication is set up, you can disallow access by password.